
Actions and Outlets – Steps Involved
Step 1 − Let’s use our First iPhone Application.
Step 2 − Select the ViewController.xib file from the files in the navigator section.
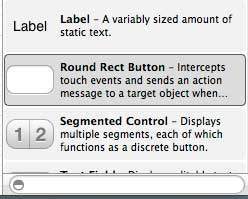
Step 3 − Now, you can select the UI elements from the library pane in the right hand side of our window, which is shown below.
Step 4 − You can drag and drop the UI elements to our view in our interface builder.
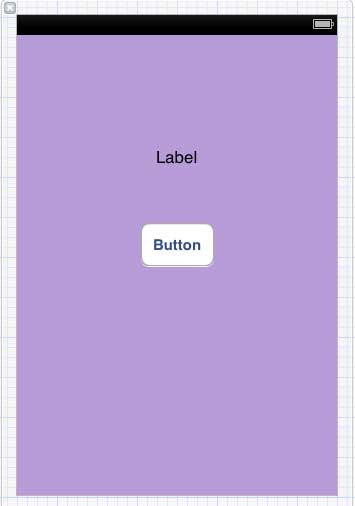
Step 5 − Let us add a Label and Round Rect Button to our view.
Step 6 − From the Editor Selector button in the workspace toolbar found on the top right corner as shown below.

Select Assistant editor button.

Step 7 − We will see two windows in our editor area in the center, one is ViewController.xib file and the other is ViewController.h.
Step 8 − Now, right click on the label and select, hold and drag the new referencing outlet as shown below.
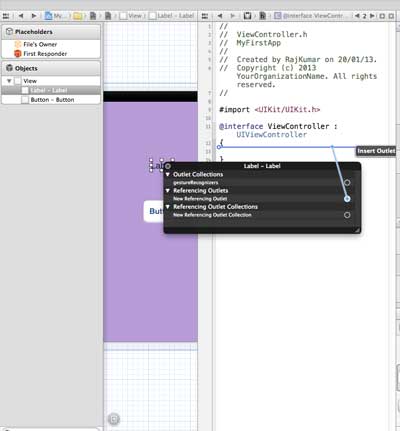
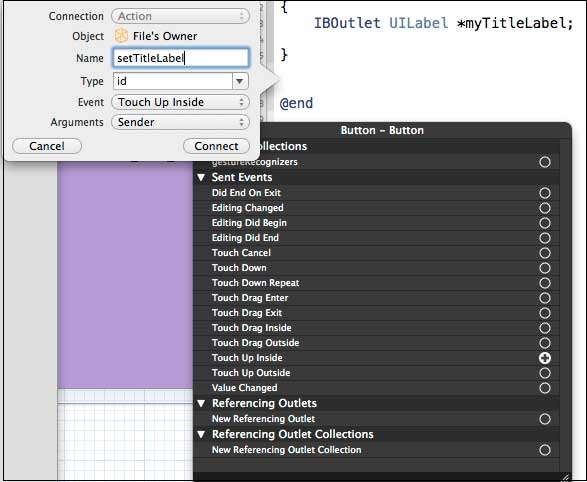
Step 9 − Drop in the ViewController.h in between the curly braces. In case there are no curly braces in the file, add the ViewController before doing this. You will find a pop-up as shown below.
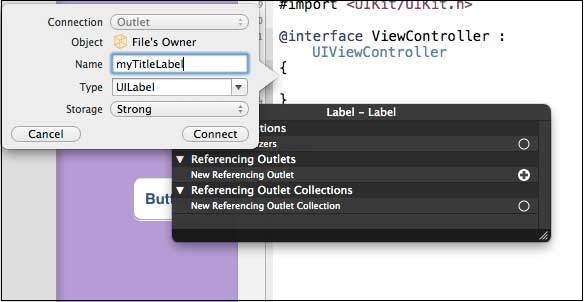
Step 10 − Type the label name for the outlet, here we have used the label myTitleLabel. Click connect and the ibOutlet will be complete.
Step 11 − Similarly, to add an action, right click the Round rect button, select touch up inside and drag it below the curly braces.
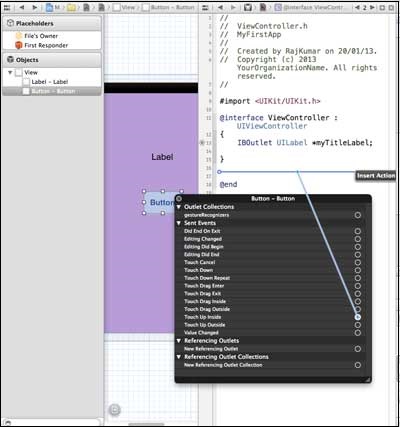
Step 12 − Drop it and name it setTitleLabel.
Step 13 − Select ViewController.m file, you’ll find a method as shown below.
-(IBAction) setTitleLabel😦id)sender{
}
Step 14 − Add a statement as shown below inside the above method.
[myTitleLabel setText:@"Hello"];
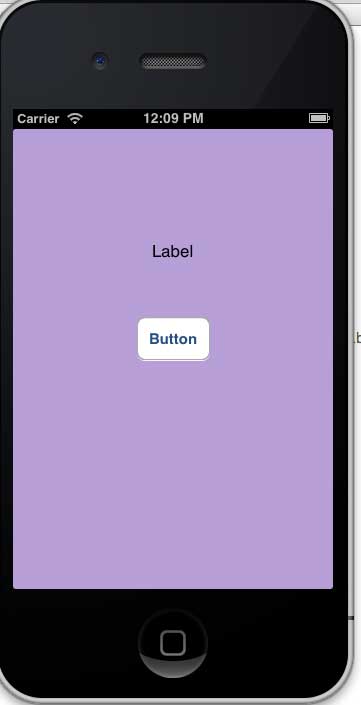
Step 15 − Let us now run the program by selecting the run button. You will see the following output.
Step 16 − Now click the button.
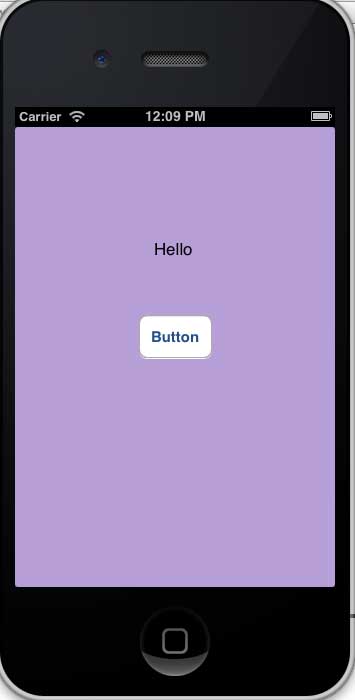
Step 17 − The label that we created have been changed by the action on the button.
Step 18 From the above example, we can conclude that IBOutlet creates a reference to the UIElement (here for the UILabel). Similarly, the IBAction links the UIButton with a method, which is called on the event touch up inside.
Step 19 − You can play around with actions by selecting different events while creating the action.
